The Traditional Craft and Pedagogy of Tanjore Painting
Cultural Significance of Tanjore Paintings
The Tanjore Painting is closely associated with and interlinked to Hinduism, its lore, puranas and epics. The mainstay is god and goddesses who were objects of worship from time immemorial. The earlier painters were called upon to paint the walls of temples, palaces, durbar halls with mythological and puranic subjects. The painters were also asked to paint portraits of the royal family. They were on the payrolls of the royal treasury.
Traditional Training and Techniques
The art of painting was generally hereditary. The auon ceremony generally started with ‘Rekhabyasa’ ,en the pupil was initiated into drawing the Rekha (line), Vakra(curve), Chakra(circle) and Prachakra(circle within circle), (Drishya Bhoothena Chakrascha Ardha Vritasascha Samanvitham—Vishnu Dharmottaram`, The chitrabhyasa usually starts with Rekhamsha Staapanam (linear presentation). The pupil is initiated into the art with the worship of Goddess Saraswathi.
Orthodox Training Methods
The next step after teaching the fundamentals was to teach him drawing straight, curved and zig-zag lines of varying thickness in red ochre and charcoal. In an orthodox method of teaching involving a combination of tradition and innovation, the training covers a period of three years. In the first year, after auspicious initiation, the trainee is taught to prepare free-hand designs, which include the various Godheads’ mudras, outline of the Godheads, flowers and animals, curtains, embellishments, angels, etc., in line drawings.
Traditional method of Contemporary and existing preparation method of preparation
Traditional Method

Contemporary Method

- Base: Jack fruit wood or teak wood. In those days only 9" planks were used, joined together with a reaper at the back side (this prevents the picture from touching the walls).
1. Base: Waterproof plywood to the required size and dimensions
2. Glue: boiled tamarind seed paste.
2. Fevicol
3. Sheets of newspapers were stuck so that there will be an even surface
3. Brown sheet
4. Destarch the medium cotton cloth.
4. Destarch the medium mull cloth
5. Grind tamarind seed, boil it in water and allow the paste to ferment for a day and use it to stick the cloth on the board.
5. Fevicol mixed with water to stick the cloth on the board.
6. Mix lime stone powdenSukkam) and tamarind paste in the ratio 2:1 and add yellow oxide (gobi) with a little bit of copper sulphate to keep the insects away. This will be yellow in colour due to the addition of yellow oxide. Three coatings of the above should be applied consecutively after each coating dries well.
6. Mix French chalk powder, fevicol with water and yellow oxide (gobi). It will be yellow in colour. Give three consecutive coatings of the above, after each coating dries well.
7. Pebbles of large size are used for polishing the prepared surface.
7. Glass bottles, tine sand paper and rounded paper weights are used for smoothening the surface.
8. Your canvas is ready. Those days free hand drawing was done. Later the pictures of deities were perforated and placed on the board, and charcoal powder was dusted or robin blue mixed with turpentine was rubbed on the perforated sheet with the help of a small piece of cloth. Once the perforated design is ready, the lines were drawn with burnt sienna.
8. Your canvas is ready, trace the required pictures of deities with the help of a carbon sheet under your tracing paper.
9. Wherever you want the gold to appear you must mix french chalk powder and soaked gum arabic, which has been soaked in water for a day or two after straining through fine cloth. Apply it as the base. The board is yellow in colour and the white base, when dried, where the gold foil is to be stuck will be reflected in contrast.
9. Wherever you want the gold to appear you must mix french chalk powder and soaked gum arabic, which has been soaked in water for a day or two after straining through fine cloth. Apply it as the base. The board is yellow in colour and the white base, when dried, where the gold foil is to be stuck will be reflected in contrast.
10. Gems, semi-precious stones were used.
10. Glass stones of various sizes and shapes are used nowadays.
11. Squirrel hair brushes.
11. Camlin synthetic brushes.
12. In the earlier days, all the jewellery were made with raised thick makku (gesso). Then paste gold foil over it, and use red and green jewellery colours(powder) mixed with Vajram (animal glue). Over the gold jewellery, these colours glittered like real stones. On the plain surfaces with a thin brush draw the relief, work designs e.g. flowers, leaves, birds, yaazhli patterns. Once gold foil is pasted on it the relief will show out well.
12. After the yellow oxide (gopi) canvas is ready and the white makku(gesso) is applied to your required areas, stick the Jaipur coloured stones with plain fevicol (without water) wherever you want (along the mandaps, peetams, jewels, crowns, ornaments). Then pour makku over the stones and areas you want to cover with gold. After it dries well, with thicker consistency of makku draw the relief work designs e.g. Leaves, mandaps, patterns, flowers, birds, yaazhli etc. After this is also dried, you must remove the makku that you have poured over the stones, with a wet cotton cloth. This will reveal the stones. Then with more thicker makku draw the outline for the mandaps, peetams in between the stones and around the stones. Then apply the gold foil to give it a rich look.
13. Once the embossing dries up, place the gold foil over the area and rub with your thumb to get the impression. Cut the foil to the exact shape and stick it with gum using a fine cloth to press it down. Make sure not to touch the foil with bare hands as it will affect the lustre. Wherever white is seen it must be covered with gold foil. Even small bits must be saved to be used for rings, nose rings and toe rings.
13. Once the embossing dries up. place the gold foil over the area and rub with your thumb to get the impression. Cut the foil to the exact shape and stick it with gum using a fine cloth to press it down. Make sure not to touch the foil with bare hands as it will affect the lustre. Wherever white is seen it must be covered with gold foil. Even small bits must be saved to be used for rings, nose rings and toe rings.
14. In earlier times stones were not used, but only stone colouring on raised work.
14. Scrape out the gold from the stones with any pointed object(a wooden stick with a nail beaten into it). Nowadays compass and pins are used for scraping.
15. Grind different coloured tablets and mix it with Vajram. Coconut shells were used as containers. With a wet brush, take the colours and apply.
15. Poster colours straight from the bottle. Plastic containers are used for larger quantities.
Finishing the Painting
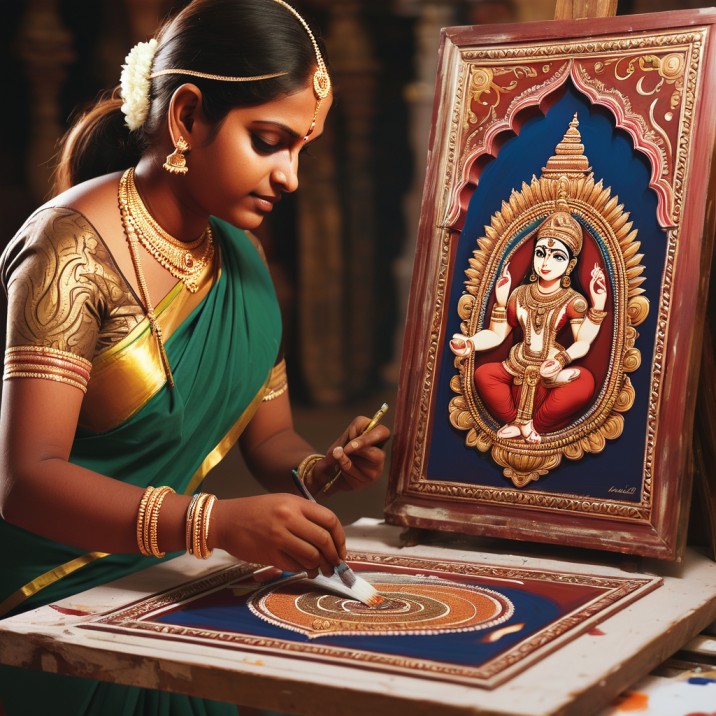
The further aspects connected to the preparation should also be carefully attended to. Once the embossing dries up in due course, place the gold foil over the area and rub with your thumb to get an impression. Cut it to the needed shape and stick the foil with gum arabic or gum made from tamarind seeds, using a cloth to press it down. While pressing do not touch with bare hands as it may lessen the luster. Also apply gold foils on flat areas wherever desired. The gold from the stones should be scraped out by using a sharp or pointed object. The picture should be painted starting with the body, hands, feet, face and other attributes, clothes and finally the background. In accordance with the painting tradition, the ‘netronmeelanam’ or opening of the eyes is the last step in this process.
Symbolism and Themes
The Tanjore painting, thus unfolding before the devotee, has the following features. There is one main figure centrally placed. This figure is formally housed within an enclosure of a palace or a temple pavilion. Thus space is circumscribed and a possibility of depicting movement or creating optical illusion is curtailed. The central figure is generally surrounded by other aspects of the deity, like consorts, or devotees placed in the borders or in a horizontal panel below the main figure in the Predella.
Depiction and Style
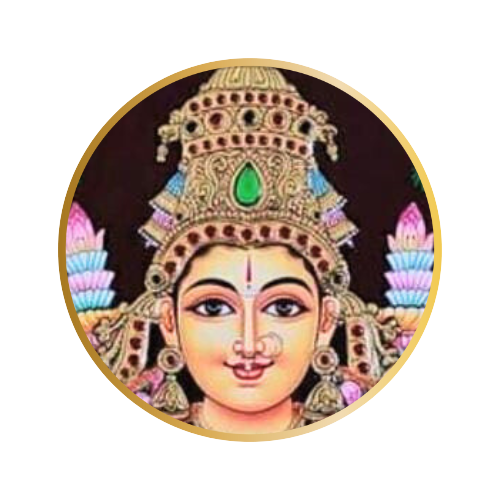
The depiction of figures in Tanjore paintings is monumental and robust. The firm clear brush outlines enclosing the form further heighten its rotundity and massiveness. All the ten fingers and the toes of the deity are shown. The garlands are mostly open-ended. The deity is always shown face front. Profile is rarely used except for certain slanting positions in details and in situations where secondary and tertiary details are to be indicated. The chief figures follow the usual hierarchy in their depiction.
Representation of Demons and Flora
It is easy to delineate a delicate and placid appearance of Gods and Goddesses in Tanjore paintings. It is the demons who appear masculine. Invariably they resemble pugilists and wrestlers with long mustaches. They are depicted in a way to instill a sense of fear and terror in the beholder. The underlined principle is victory of goodness over evil and the protection of society (Dushta Nigraha Shista Paripaalana).
Natural Elements and Materials Used
The animals in the paintings are generally the vahanas (mounts of gods) like Rishabha, Simha, Mayura, Garuda, Hansa, Mooshika, and animals. The flora represented in the Tanjore paintings are generally Ashwatha (Banyan), Ashoka, Kadamba, Arjuna, Champaka, etc. The depiction of nature is not in a prolific way but in a generally stylistic manner. The wooden panels were usually large and were framed.
Modern Display and Usage
The four places that were meant for Tanjore paintings in the earlier days were, mandapams inside or adjacent to the temples, rich people’s houses and gardens with mandapams, on the occasion of Rama Navami or Krishnashtami and in processions in the temples. Nowadays Tanjore paintings are also displayed at the entrance of schools, corridors of public buildings and auditoriums, reception halls of hospitality centers and also in star hotels.
Artistic Tradition and Influence
The paintings were never signed. There was no name indication. The artists remained anonymous. The Indian tradition of self-effacing, adopted by poets and artists continued in the case of Tanjore paintings also. The exotic influence was also felt in some Tanjore paintings. When the person commissioning the painting desired a particular item to be added in the painting, it was included. Courtesans, Chandeliers, Violin, Rolls Royce, Cat, etc., were thus included in many Tanjore paintings.
Frames and Presentation
The pictorial frame is essential to complement a painting or drawing. The origin of frames can be traced back to the treatment of the doorway of a temple either in the interior or looking out to the exterior. We find the enhancement of pictures or bas-reliefs by simple linear boundary in earlier drawings. A raised line to which latter elaborations at the corners of scroll-work, plant forms and other motifs were included.

